Sidney: 0.2 is a boot2root challenge created by knightmare2600 and hosted by vulnhub.
After booting the the VM, I used netdiscover to find its IP Address which was 192.168.2.113 and our machine’s one was 192.168.2.112.
Enumeration
Lets begin by scanning the VM using nmap:
1 2 3 4 5 6 7 8 9 10 11 12 13 14 15 16 17 18 19 20 21 22 | |
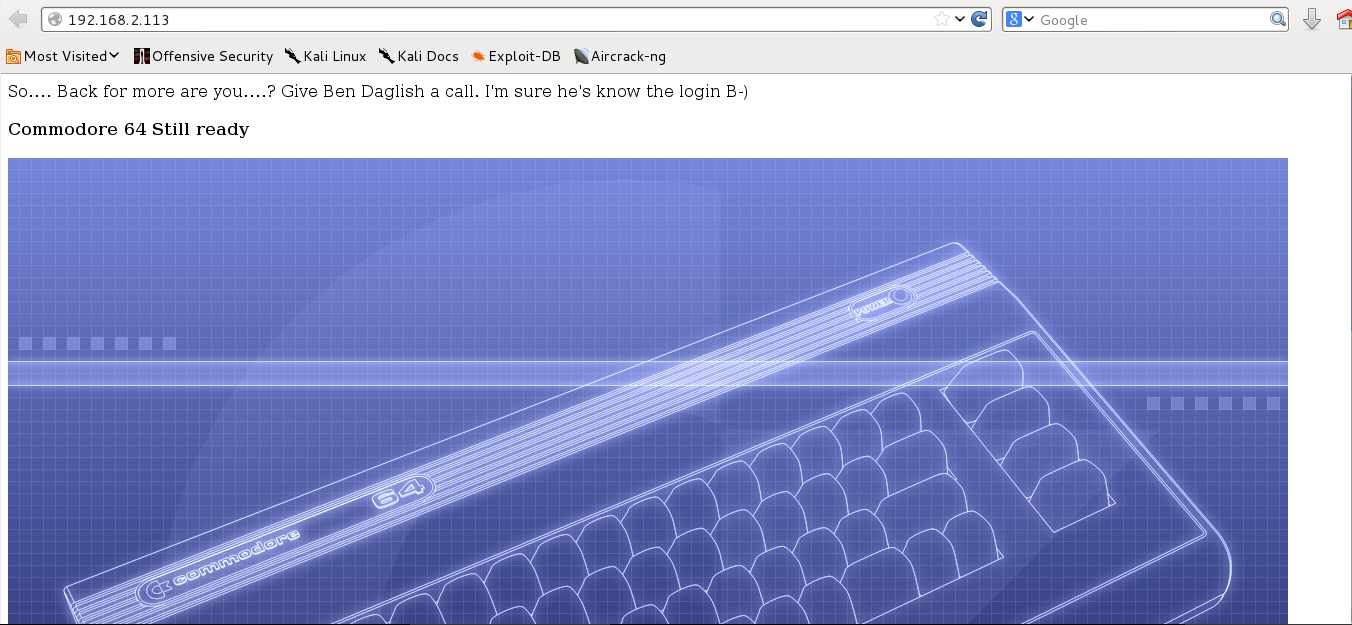
So It seems that Apache web service is the only service that was up and running on the target machine, so lets visit its main index page.
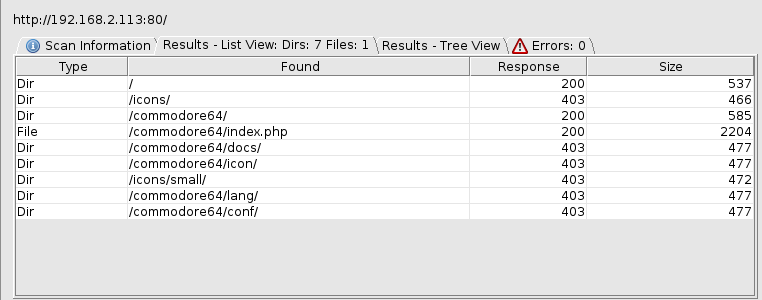
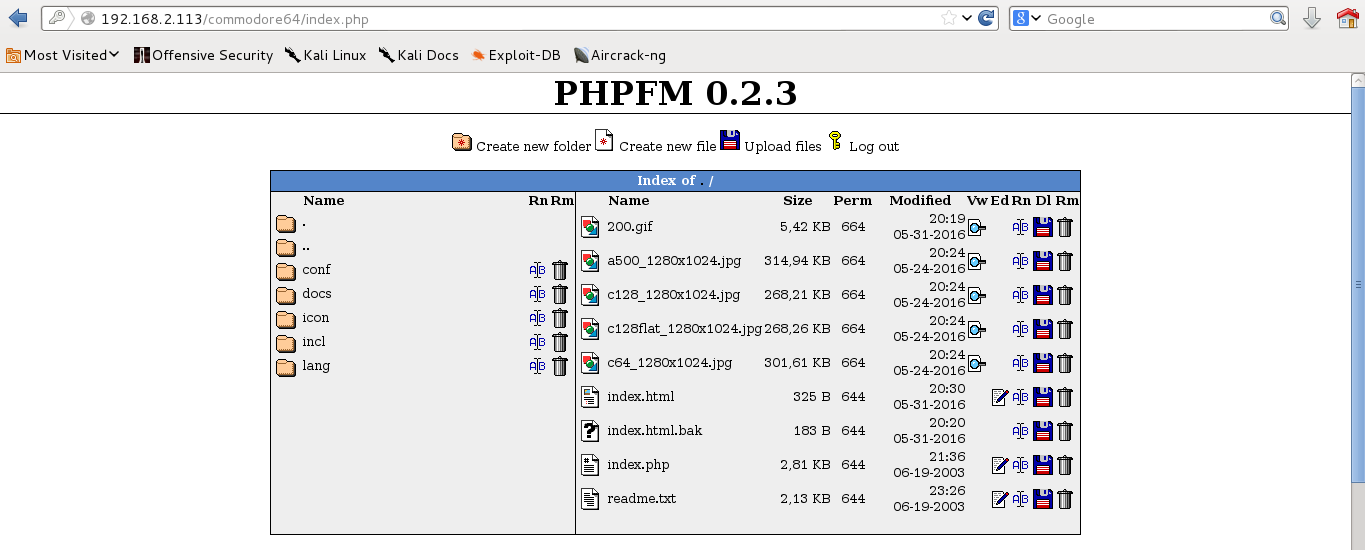
Nothing was interesting here. Then, I used DirBuster to brute force directories and files names on the target web server. A commodore64/ directory and commodore64/index.php file were found as show in the figure below:
By doing a quick search on the commodore64 keyword, the Commodore 64 wikipedia page shows that It’s an 8-bit home computer introduced in January 1982 by Commodore International.
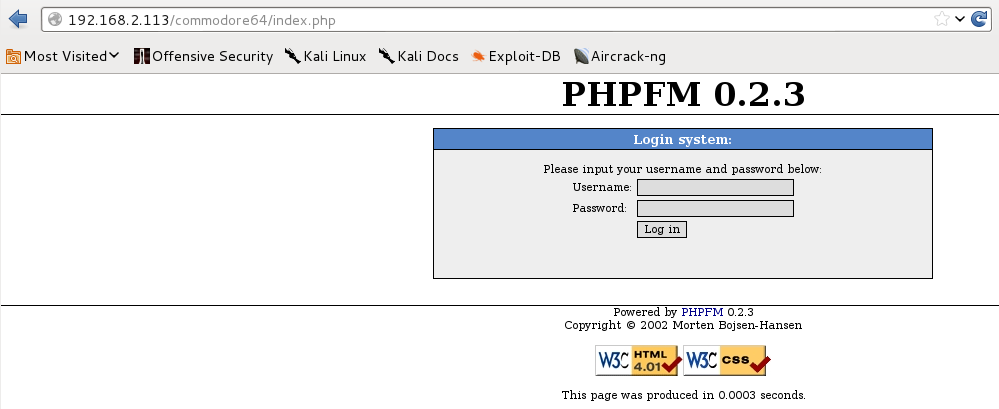
Ok, lets get back to the dirbuster results. I found that the commodore64/index.php file is actually the login page for a php file manager “PHPFM 0.2.3”.
The other result of DirBuster was the commodore64 directory where I found a really interesting information in the source code of its page.
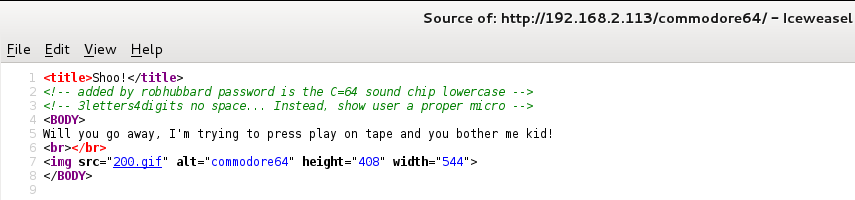
I assumed that the above information was a hint for the login credentials to the PHPFM login page. It stated that the password for robhubbard is the C=64 sound chip lowercase and the format of the password is 3letters4digits without a space.
By getting back to the Commodore 64 wikipedia page, I found the following information:
“There are two versions of the SID "Sound Interface Device” chip: the 6581 and the 8580. The MOS Technology 6581 was used in the original (“breadbox”) C64s, the early versions of the 64C, and the Commodore 128. The 6581 was replaced with the MOS Technology 8580 in 1987.“
Since Commodore64 used “MOS Technology 6581/8580 SID chips” and the hint I have found stated that the password’s format is three lowercase letters and four digits without a space, my initial attempt was to use mos6581 and mos8580 as the passwords for the user robhubbard to login to the PHPFM, but it failed!
After a little thinking I thought that maybe the 4 digits in the password field weren’t the right ones, so my second attempt was to try all the four digits in the range starting from “6500 to 6599”.
To conduct that brute force attack, I used Burp Suite Intruder attack with the Numbers payload.
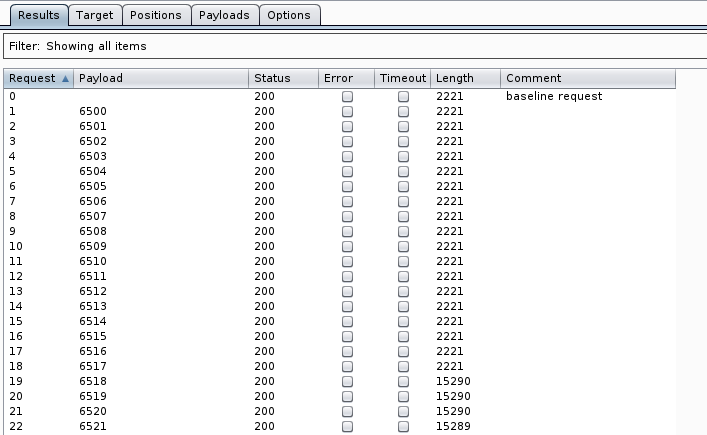
The 4-digits payload 6518 returned a different response length, and a quick check shows that mos6518 was actually the right password for the robhubbard user as shown below. Wonderful!
Remote Command Execution
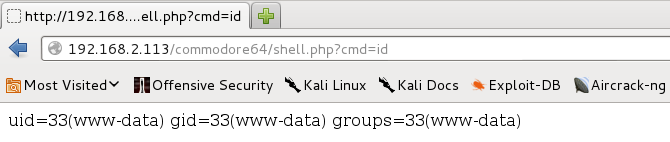
My next step was to get RCE on the target server by uploading a simple php shell using the PHPFM file manager.
1
| |
I successfully got RCE using the uploaded script http://192.168.2.113/commodore64/shell.php?cmd=id as shown below:
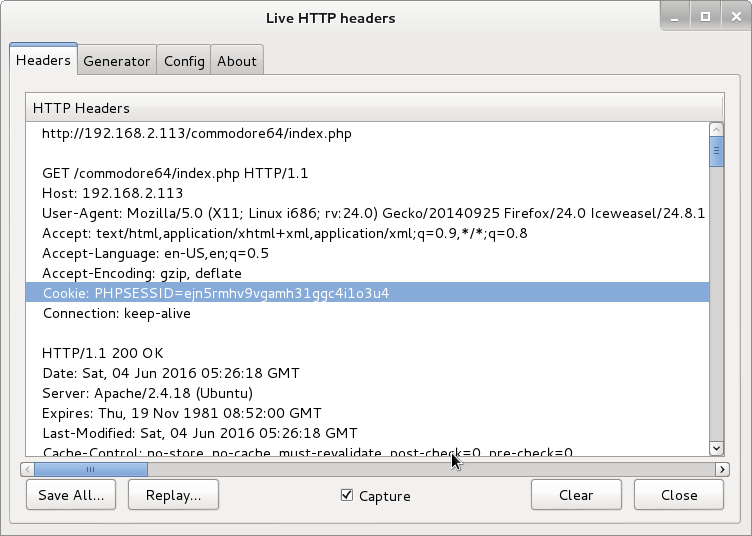
After getting the PHPSESSID using Live HTTP headers firefox add-on, I continued exploiting the target using the cURL utility.
1 2 3 4 5 | |
Then I used the perl-reverse-shell which is provided by pentestmonkey.net to get an interactive shell on the target system.
Basic modifications in the perl reverse shell:
1 2 3 | |
After uploading the perl-reverse-shell “revshell.pl” using the PHPFM file manager, and while listening on port 443 on my local machine, I executed revshell.pl on the target system using the following command:
1
| |
1 2 3 4 5 6 7 8 9 10 | |
Privilege Escalation
The OS version is Ubuntu 16.04 LTS and its kernel version is 16.04 LTS as shown below:
1 2 3 4 5 6 7 8 9 10 11 12 13 14 | |
This version of Ubuntu 16.04 LTS and its associated kernel 4.4.0-21-generic are suffered from a UAF via double-fdput() in bpf(BPF_PROG_LOAD) error path vulnerability, which can lead to a local root privilege escalation.
The description of the vulnerability report from google project zero states that: “In Linux >=4.4, when the CONFIG_BPF_SYSCALL config option is set and the kernel.unprivileged_bpf_disabled sysctl is not explicitly set to 1 at runtime, unprivileged code can use the bpf() syscall to load eBPF socket filter programs. These conditions are fulfilled in Ubuntu 16.04.”
Also, an exploit is available with the vulnerability report, and it’s hosted on exploit-db as well.
Once again, I uploaded the exploit “exploit.tar” to the target server using the PHPFM file manager, extracted the tar file, compiled the exploit “./compile.sh”, executed the exploit “./doubleput”, and root privileges were obtained as shown below:
1 2 3 4 5 6 7 8 9 10 11 12 13 14 15 16 17 18 19 20 21 22 23 24 25 26 27 28 29 30 31 32 33 34 35 36 37 38 39 40 41 | |
Capturing the flag
By following the .commodore64 directory tree, I found two files under the /root/.commodore64/.miami/vice directory: flag.zip and versatile_commodore_emulator.
1 2 3 4 5 6 7 8 | |
The flag.zip file was password protected, so I copied it to the /var/www/html/ directory, hence I can download it to my local machine through the web service.
1 2 3 4 5 6 7 8 9 | |
Then, I used fcrackzip along with rockyou.txt wordlist to crack the flag.zip password file. The password was successfully found 38911 as shown below:
1 2 3 4 5 6 7 8 9 10 11 | |
A quick search shows that D64 Image is a Commodore64 Disk Image, and it can be attached under the Versatile Commodore Emulator. So it appears that the file I have found earlier versatile_commodore_emulator was just a hint that I will need to use that emulator to get the flag.
I downloaded the VICE Emulator source code, and found a tutorial on how to install and use the VICE Emulator.
I used the following commands to install the VICE Emulator on my machine:
1 2 3 4 | |
Then I used the x64 flag.d64 command to “autoload” the flag.d64 image from the command line and captured the flag as shown below:
1
| |

Finally, I would like to thank knightmare2600 for creating the VM, and VulnHub for hosting it.